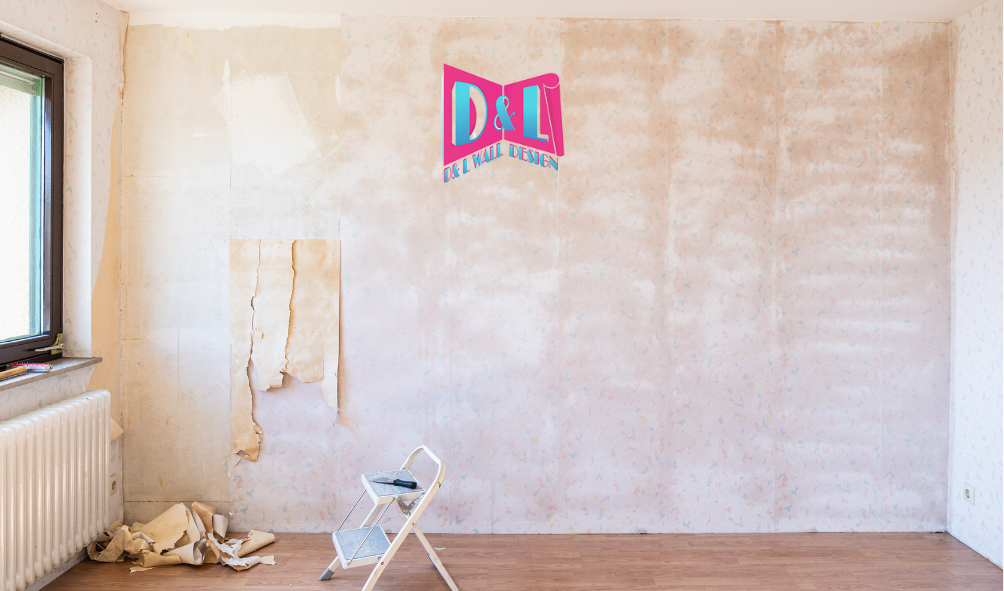
Are you tired of staring at those outdated, stubborn wallpaper patterns that have been haunting your walls for years? Well, it’s time to bid farewell to those eyesores and say hello to a fresh, new look for your space! In this article, we will show you how to effortlessly remove wallpaper and give your walls a much-needed makeover.
DIY wallpaper removal can seem like a daunting task, but with the right techniques and tools, it can be a breeze. We will guide you through step-by-step instructions, providing helpful tips and tricks along the way. From preparing your walls to choosing the most efficient wallpaper removal method, we’ve got you covered.
Say goodbye to expensive professional services and hello to the satisfaction of completing a home improvement project all on your own. Whether you’re looking to update your living room, bedroom, or any other space, our DIY wallpaper removal guide will give you the confidence to tackle this task with ease.
Get ready to transform your space and enjoy the rewarding feeling of a job well done. Let’s get started on your wallpaper removal journey today!
Tools and supplies needed for DIY wallpaper removal
Before you begin the wallpaper removal process, it’s essential to gather the necessary tools and supplies. Having the right equipment will make the task much easier and more efficient. Here are some items you’ll need:
- Wallpaper scorer: This tool is used to create small holes in the wallpaper, allowing the removal solution to penetrate and loosen the adhesive.
- Putty knife or scraper: A putty knife or scraper is essential for peeling off the wallpaper once it has been loosened.
- Spray bottle or garden sprayer: You will need a spray bottle or garden sprayer to apply the wallpaper removal solution evenly.
- Plastic drop cloths: Protect your floors and furniture by covering them with plastic drop cloths.
- Wallpaper removal solution: Several commercially available wallpaper removal solutions work effectively. Alternatively, you can create your solution using warm water and a small amount of dish soap or vinegar.
- Sponge or cloth: Use a sponge or cloth to apply the wallpaper removal solution to the walls.
- Ladder or step stool: Depending on the height of your walls, you may need a ladder or step stool to reach the upper areas.
Now that you have all the necessary tools and supplies, it’s time to prepare the room for wallpaper removal.
Preparing the room for wallpaper removal
Before you start removing the wallpaper, it’s crucial to prepare the room properly. Taking the time to prepare will make the entire process smoother and more efficient. Here are the steps to follow:
- Clear the room: Remove all furniture, wall decor, and other items from the room. This will give you more space to work and prevent any damage to your belongings.
- Cover the floors and furniture: Lay down plastic drop cloths to protect your floors and furniture from any potential water damage or adhesive residue.
- Turn off the power: If there are any electrical outlets or switches on the walls you’ll be working on, turn off the power to ensure your safety.
- Remove outlet covers and switch plates: Use a screwdriver to remove outlet covers and switch plates from the walls. This will give you a clean surface to work with.
- Test the wallpaper: Before applying any water or removal solution, test a small area of the wallpaper to see how it reacts. This will help you determine the best method to use for the specific type of wallpaper you have.
Once you’ve completed these preparation steps, you’re ready to start removing the wallpaper.
A step-by-step guide to removing wallpaper
Removing wallpaper is a step-by-step process that requires patience and attention to detail. Follow these instructions to ensure a successful wallpaper removal:
- Score the wallpaper: Use a wallpaper scorer to create small holes in the wallpaper. This will allow the removal solution to penetrate and loosen the adhesive.
- Apply the removal solution: Fill a spray bottle or garden sprayer with the wallpaper removal solution. Spray the solution onto the wallpaper, making sure to saturate it thoroughly.
- Let the solution sit: Allow the removal solution to sit on the wallpaper for the recommended amount of time specified on the product label. This will give it enough time to dissolve the adhesive.
- Start peeling the wallpaper: Use a putty knife or scraper to gently peel off the wallpaper from one corner or edge. Start at the bottom and work your way up.
- Keep the wallpaper wet: As you peel off the wallpaper, continue to spray the removal solution onto the exposed areas. Keeping the wallpaper wet will make it easier to remove.
- Remove any stubborn spots: If you encounter stubborn areas that are not coming off easily, reapply the removal solution and let it sit for a few more minutes. Use the putty knife or scraper to gently scrape off the remaining wallpaper.
- Repeat the process: Continue the same steps until all the wallpaper has been removed from the walls.
By following this step-by-step guide, you’ll be able to remove wallpaper effortlessly and efficiently. However, there may be instances where stubborn wallpaper patterns make the removal process more challenging. Let’s explore how to deal with such patterns.
Dealing with stubborn wallpaper patterns
While most wallpaper can be removed easily following the steps mentioned above, some patterns may be more stubborn and resistant to removal. Here are a few strategies to tackle stubborn wallpaper patterns:
- Heat and steam: If the wallpaper is not coming off easily, try using heat and steam to loosen the adhesive. You can use a wallpaper steamer or a household iron with a steam setting. Hold the steamer or iron close to the wallpaper for a few seconds to soften the adhesive, and then proceed with the removal process.
- Use a fabric softener solution: Fabric softener is known to be effective in softening wallpaper adhesive. Mix equal parts fabric softener and hot water in a spray bottle. Spray the solution onto the wallpaper and let it sit for a few minutes before attempting to remove it.
- Score the wallpaper again: If the wallpaper remains stubborn even after using heat or a fabric softener solution, try scoring the wallpaper again. This will create more holes for the removal solution or steam to penetrate.
Remember, patience is key when dealing with stubborn wallpaper patterns. Take your time and try different methods until you find what works best for your specific situation.
Tips for a smooth and effortless wallpaper removal process
To make your wallpaper removal process even smoother and more efficient, consider the following tips:
- Work in small sections: Instead of trying to remove large sections of wallpaper at once, divide the walls into smaller sections. This will make the process more manageable and prevent the removal solution from drying out before you can scrape off the wallpaper.
- Work from top to bottom: Start removing the wallpaper from the top and work your way down. This will prevent any water or adhesive residue from dripping onto areas you have already cleared.
- Use a plastic scraper: When using a putty knife or scraper, opt for a plastic one instead of a metal one. Plastic scrapers are less likely to damage the wall surface.
- Cover the floor: Place a towel or drop cloth on the floor beneath the area you’re working on. This will catch any water or adhesive residue that may drip down.
- Protect yourself: Wear protective goggles and gloves to shield your eyes and hands from any potential debris or chemicals.
By following these tips, you’ll be able to remove wallpaper effortlessly and efficiently, avoiding any unnecessary frustrations along the way.
Cleaning and prepping the walls after wallpaper removal
Once you have successfully removed the wallpaper, it’s important to clean and prep the walls before applying a new finish. Follow these steps to ensure a smooth and clean surface:
- Remove any adhesive residue: Use a sponge or cloth dampened with warm water to wipe away any remaining adhesive residue from the walls. If necessary, you can also use a mild detergent or adhesive remover.
- Repair any wall imperfections: Inspect the walls for any holes, cracks, or other imperfections. Fill them in with spackling paste or a wall repair compound. Allow the compound to dry and then sand it smooth.
- Prime the walls: Apply a coat of primer to the walls to create a smooth and even surface for the new finish. Primer will also help the new finish adhere better and prevent any old wallpaper patterns from bleeding through.
Once the walls are clean, repaired, and primed, you’re ready to apply a fresh coat of paint, new wallpaper, or any other finish of your choice.
Alternative methods for wallpaper removal
If the traditional wallpaper removal process seems too time-consuming or challenging for your specific situation, there are alternative methods you can consider. These methods may be more suitable for certain types of wallpaper or specific circumstances. Here are a few alternatives:
- Steam wallpaper removal: Wallpaper steamers can be rented or purchased to make the removal process quicker and more efficient. The steam helps to soften the adhesive, making it easier to peel off the wallpaper.
- Dry stripping: Some wallpaper can be dry stripped without the use of any removal solution or steam. This method involves peeling off the top layer of the wallpaper and then using a scraper to remove the backing.
- Chemical wallpaper removers: There are chemical wallpaper removers available on the market that can accelerate the removal process. These products are typically applied to the wallpaper and left to sit for a specific amount of time before scraping off.
Before attempting any alternative methods, make sure to read and follow the manufacturer’s instructions carefully to avoid any damage to your walls or potential hazards.
Hiring a professional wallpaper removal service
While DIY wallpaper removal can be a rewarding and cost-effective option, there may be instances where hiring a professional wallpaper removal service is the best choice. Here are a few scenarios where professional help may be beneficial:
- Time constraints: If you have a tight deadline or limited time to complete the wallpaper removal, hiring professionals can ensure a faster and more efficient process.
- Large or complex wallpaper patterns: If you’re dealing with intricate or delicate wallpaper patterns, professionals with experience in handling such designs can ensure a smooth removal without any damage.
- Health concerns: If you have health issues or sensitivities to certain chemicals used in wallpaper removal solutions, it’s best to leave the task to professionals who can handle it safely.
When hiring a professional service, make sure to do your research, read reviews, and ask for recommendations to ensure you choose a reputable and experienced company.
Enjoy your new, pattern-free walls
With the help of our DIY wallpaper removal guide, you can bid farewell to those stubborn wallpaper patterns and enjoy a fresh, new look for your space. By following the step-by-step instructions, using the right tools and supplies, and incorporating helpful tips and tricks, you’ll be able to remove wallpaper effortlessly and efficiently.
Remember to prepare the room properly, work in small sections, and be patient when dealing with stubborn wallpaper patterns. Clean and prep the walls after removal, and consider alternative methods or professional services if necessary. The result will be pattern-free walls that provide a blank canvas for your creativity and personal style.
Say goodbye to those outdated eyesores and hello to a space that reflects your unique taste and personality. Get ready to transform your walls and enjoy the satisfaction of a job well done. For the best, hassle-free wallpaper removal, hire a reliable wallpaper contractor in Miami to help you transform your living space with the best wallpaper design. D&L Wall Design is one of the professional wallpaper installation services providers that you can rely on. Contact D&L Wall Design at 786 389-3914 for a FREE consultation today!