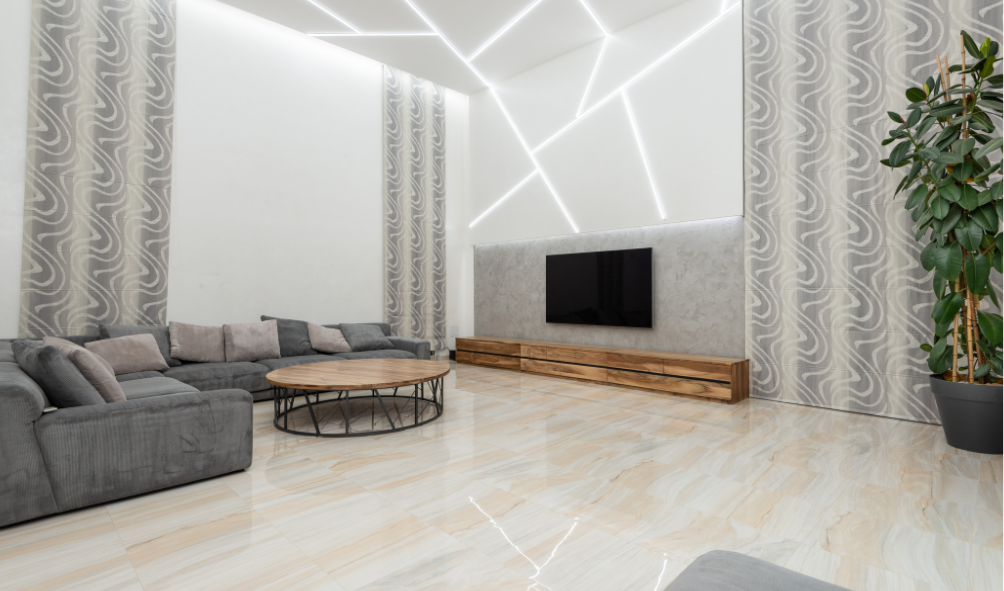
Installing wallcovering can change the look of any room quickly and easily. You don’t need to be a professional to get smooth, clean results if you follow the right wallcovering installation methods and prepare properly. Knowing the right tools and steps will help you avoid common mistakes and ensure the wallcovering sticks well.
Before you start, it’s important to check your walls for moisture or damage. A clean, dry, and smooth surface will make the job easier and help the wallcovering last longer. With careful measuring and cutting, you can achieve a neat finish that looks great.
Whether you choose to do it yourself or hire someone, understanding the process gives you control over your space. With simple tips and clear steps, you can make your walls stand out with style and confidence.
Key Takeaways
- Proper preparation of walls is essential for good results.
- Using the right tools and techniques ensures a smooth installation.
- Knowing the process helps you decide between DIY and professional help.
Preparing for Wallcovering Installation
Before you start, you need to know how much wallpaper to buy, check your walls carefully, and gather the right tools. These steps will help make the installation smoother and prevent problems as you work.
Measuring and Calculating Materials
- Measure the height and width of each wall you want to cover. Write down each measurement separately.
- Add 4 inches to the height to allow for trimming at the ceiling and baseboard.
- Calculate how many strips you need by dividing the wall width by the wallpaper roll width. Round up to the next whole number.
- Buy extra wallpaper, about 10% more, for pattern matching and mistakes.
Keep these simple formulas handy:
| Step | Formula |
| Strip length needed | Wall height + 4 inches |
| Number of strips | Wall width ÷ Roll width, round up |
| Total wallpaper | Strip length × Number of strips × 1.1 (for extra) |
Surface Inspection and Repair
- Look for cracks, holes, or bumps on your walls. These will show through the wallpaper if you don’t fix them.
- Fill holes and cracks with spackle or a wall filler. Let it dry completely before you sand it smooth.
- Use 120-grit sandpaper to even out rough spots and remove any loose paint.
- Make sure the wall is clean and dry. Use a damp cloth to wipe off dust, grease, or dirt.
- If your wall is new drywall or plaster, apply a wallpaper primer. This helps the wallpaper stick better and makes removing it easier later.
Gathering Tools and Supplies
Collect everything you need before you begin to keep your work steady.
Basic tools include:
- Measuring tape and pencil
- Straight edge or level
- Utility knife with extra blades
- Wallpaper adhesive (check the wallpaper type for recommended glue)
- Smoothing tool or rubber trowel
- Sponge or cloth for cleaning
- Step ladder or stool
Have a bucket and water ready if using paste-thin wallpaper or if you need to clean tools during installation.
Organizing your tools in one spot saves time and helps prevent mistakes.
Wallcovering Installation Steps
You need to prepare carefully and work with precision when installing wallcoverings. Cutting to fit your space, applying the right amount of adhesive, and properly hanging the panels are critical for a clean, professional look. Each step calls for attention to detail to avoid wrinkles, bubbles, and misaligned patterns.
Cutting and Matching Patterns
- Start by measuring your wall height accurately. Add a few extra inches to your measurements for trimming later.
- When cutting, use a sharp utility knife or scissors. Cut each strip slightly longer than the wall height. This gives room for adjustment at the top and bottom.
- If your wallcovering has a pattern, carefully match it at the seams. Align the design so patterns flow naturally from one strip to the next. This prevents awkward breaks in the design.
- Label each strip in order to keep track of placement. Cut strips on a clean, flat surface to maintain straight edges. Take your time; sloppy cuts make your finished wallcovering look poor.
Applying Adhesive Correctly
- Use the adhesive recommended for your wallcovering type. Some wallpapers require applying paste directly to the back, while others need adhesive on the wall.
- Apply adhesive evenly with a brush or roller. Avoid clumps or bare spots because these cause bubbles or peeling.
- Follow the wait time instructions. Some adhesives need several minutes to activate before hanging the wallpaper.
- Before applying the paste, make sure your wall is clean, dry, and smooth. Fill holes and sand rough spots to create a good surface for bonding.
- Spread adhesive over your cut strips or the wall in manageable sections. This prevents the paste from drying before you hang the paper.
Hanging the Wallcovering
- Start by positioning your first strip using a level or plumb line to keep it straight. Align the top of the strip with the ceiling or where you want it to start.
- Smooth the strip onto the wall using a wallpaper brush or smoothing tool, applying firm pressure from top to bottom. Work out air bubbles as you go.
- Trim excess material at the top and bottom with a sharp knife after the strip is in place. Be precise to avoid tearing the paper.
- Overlap seams slightly if the instructions say so, or butt edges gently together for a seamless look.
- Continue hanging strips in order, matching patterns and smoothing each strip carefully. Reattach any fixtures after the wallpaper is fully dry.
Finishing Touches and Cleanup
After installing your wallcovering, it’s important to handle the small details carefully to ensure a clean, professional look. You’ll need to trim leftover material, fix any air bubbles or loose seams, and clean the entire work area. Taking these steps with care will help your wallcovering last longer and look smooth.
Trimming Excess Material
Use a sharp utility knife and a straight edge to trim any extra wallpaper at the top and bottom. Make clean, precise cuts to avoid tearing the paper or damaging the wall. Trim close to the edges, especially around corners, outlets, and trim pieces.
Take your time when trimming around switches or other fixtures. Score lightly first and then cut carefully to get a neat fit. Removing excess material ensures there won’t be visible gaps or wrinkles after the wallpaper dries.
Removing Air Bubbles and Seams
Check the wallpaper surface for air bubbles after applying it. Use a smoothing tool or a plastic scraper to gently press out bubbles from the center toward the edges. This helps the paper lay flat against the wall and prevents peeling.
For seams that do not lie flat, use a seam roller to press them down firmly. This will keep the edges tight and prevent moisture from getting underneath. If any bubbles or wrinkles persist, smooth them again carefully to avoid damaging the paper.
Cleaning Up the Work Area
Remove any leftover paste or adhesive immediately using a damp sponge. Wipe gently to avoid tearing the wallpaper. Make sure to clean your tools and any splashes on the floor or furniture.
Collect scraps, cut pieces, and trash to keep your space tidy. Allow the wallpaper time to dry before touching or hanging anything on the walls. Leaving the area clean prevents damage and helps maintain a neat finish.
DIY vs Hiring an Expert
You might be thinking about installing wallpaper yourself to save money. DIY can be cheaper, but it takes time, patience, and some skill. You’ll need the right tools and must learn how to handle adhesives and patterns properly. Mistakes like bubbles or misaligned seams are common if you’re new.
Hiring a professional wallcovering installation contractor offers specific benefits. Experts have experience with many types of wallpaper and surfaces. They work quickly and tend to produce cleaner, longer-lasting results. If you have a high-end or textured wallpaper, hiring a pro is usually the better choice.
Here’s a quick comparison:
| Aspect | DIY | Hiring an Expert |
| Cost | Lower, but includes your time | Higher, but often worth the price |
| Skill needed | Moderate to high | None required from you |
| Time required | Longer | Much faster |
| Quality and Finish | Risk of mistakes | Professional, neat finish |
| Tools and Materials | You buy or rent | Contractor supplies everything |
If you want a hassle-free experience, consider a professional wallpaper installation contractor in Miami, FL, who can give you expert service tailored to your walls. This approach frees you from the stress and offers guaranteed quality. Contact D&L Wall Design at 786 389-3914 for a FREE consultation today!